You hit a plateau and haven’t increased your overhead press weight in months. Your shoulders feel tight, your form breaks down halfway up, and you’re starting to wonder if you’ll ever push past this plateau. It’s probably not your strength that’s holding you back. Most lifters overlook the single factor that can liberate instant gains in their press, and it takes just minutes to fix.
The Anatomy of the Overhead Press
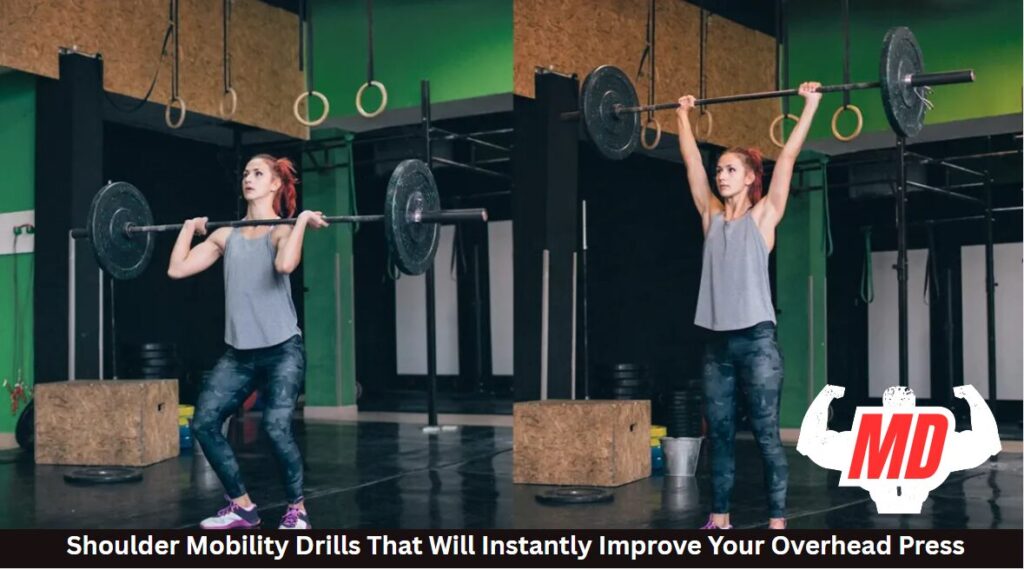
When you press a barbell or dumbbell overhead, you’re orchestrating a complex movement that demands coordination from multiple joints and muscle groups. Your shoulder mobility directly impacts how efficiently you can execute this lift. The glenohumeral joint works alongside your scapula, requiring precise scapular control to create a stable base for pressing.
Your rotator cuff activation keeps the humeral head centered in the socket throughout the movement. Meanwhile, thoracic spine mobility determines whether you can achieve proper overhead mechanics without compensating through excessive lumbar extension.
Limited mobility in any of these areas forces compensation patterns that reduce power output and increase injury risk. Understanding these anatomical relationships helps you identify which specific mobility restrictions are holding back your press.
Signs You Need Better Shoulder Mobility
If you’re struggling to lock out your arms directly overhead without arching your back excessively, you’ve discovered one of the clearest indicators of restricted shoulder mobility. Watch for shoulder pain at the top of your press, inability to keep your biceps next to your ears, or compensating by flaring your ribs forward.
Limited range of motion directly impacts your overhead strength. You’ll notice weights feeling heavier than they should, and your joint stability suffers under load. Check your shoulder flexibility by attempting to clasp your hands behind your back. Difficulty here reveals posterior tightness.
Other red flags include pinching sensations during pressing movements, asymmetrical bar positioning, and needing excessive warm-up sets before feeling comfortable overhead.
Warm-Up vs. Mobility: What’s the Difference?
Recognizing these mobility limitations leads to an important distinction many lifters overlook. Your warm-up isn’t the same as mobility work, though both serve critical roles in overhead mechanics.
A warm-up increases blood flow and neural activation through movement patterns you perform during training. Think arm circles and light pressing movements that prepare your shoulder joint for load.
Mobility work targets specific restrictions in your thoracic spine and shoulders through sustained stretches and controlled movements. You’re creating lasting changes in tissue quality and joint range of motion.
You need both before heavy pressing. Start with 5-10 minutes of mobility drills to free up restricted areas, then transition to dynamic warm-up movements. This combination guarantees you’re not just warm but actually capable of achieving proper overhead positions under load.

Drill 1: Wall Slides for Scapular Control
Now that you understand the difference between warm-ups and mobility work, let’s start with wall slides. It is your foundation drill for building scapular control.
Stand with your back against a wall, feet about 6 inches away. Press your lower back flat, then raise your arms into a “W” position with elbows bent at 90 degrees. Raise your arms slowly up the wall into a “Y” shape, making sure they stay in contact with the surface the entire time. You’ll feel your shoulder blades working hard to stay stable.
This drill teaches proper scapular movement patterns essential for the overhead press. Add 10-15 reps to your mobility warm-up, focusing on smooth, controlled motion. If you can’t maintain wall contact, you’ve identified a key shoulder mobility restriction that’s limiting your pressing power.
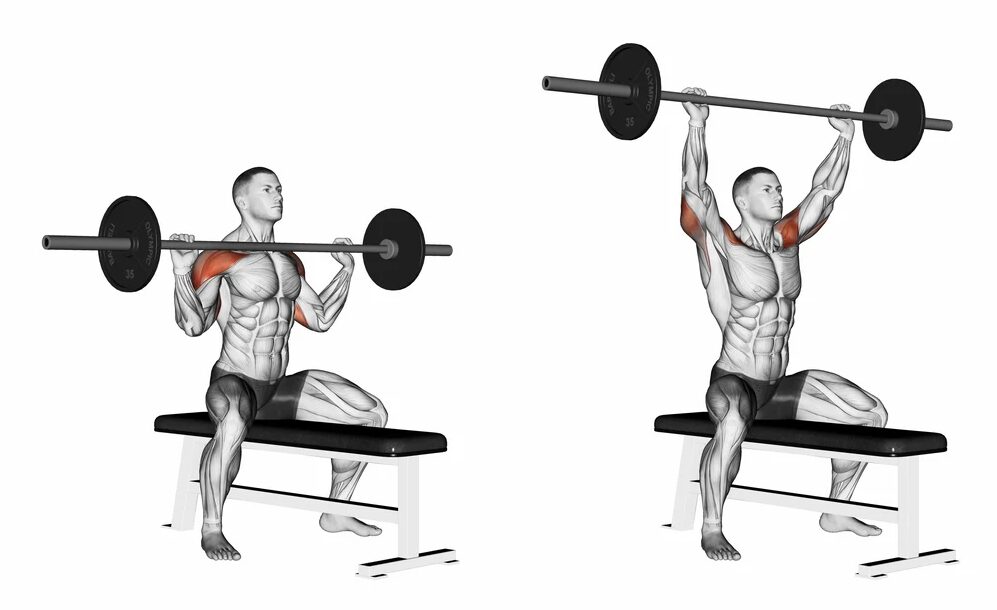
Drill 2: Thoracic Extensions Over Foam Roller
Wall slides target your shoulder blades, but your thoracic spine often creates the real overhead mobility bottleneck. Without adequate thoracic extension, you’ll compensate through your lower back or shoulders, limiting your pressing performance.
Position a foam roller across your upper back, aligning it beneath your shoulder blades. Keep your hands behind your head for support and bring your elbows close together. Extend backward over the roller, keeping your ribs down and core engaged. Hold for 2-3 seconds, then return to neutral.
Work through 2-3 segments of your thoracic spine, performing 5-8 reps at each level. You’ll feel an immediate difference in how effortlessly your arms move overhead. This improved thoracic mobility translates directly to stronger, safer presses by allowing proper shoulder positioning without compensation.
Drill 3: Banded Shoulder Dislocates
Once your thoracic spine moves freely, internal shoulder rotation becomes the next barrier to overhead excellence. Banded shoulder dislocates target this limitation directly, improving shoulder flexibility and range of motion in minutes.
Grab a resistance band with both hands, arms wider than shoulder-width. Keep your elbows straight and slowly bring the band overhead and behind your back. Return to the starting position. You’ll feel a deep stretch through your chest and anterior shoulders.
This shoulder warm-up drill opens tight pectoral muscles and enhances shoulder mobility throughout the entire joint capsule. Start with a lighter band and wider grip, progressively narrowing as your shoulder health improves. Perform 15-20 controlled repetitions before pressing to access smoother, more powerful overhead positions.
Drill 4: Sleeper Stretch for Posterior Capsule
The posterior shoulder capsule often becomes the hidden culprit behind restricted overhead mobility. When this tissue tightens, it limits your shoulder’s ability to reach the proper overhead press position, forcing compensations that drain power and risk injury.
To perform the sleeper stretch, lie on your side with your bottom arm at 90 degrees. Use your top hand to push the bottom forearm toward the floor gently. You’ll feel a deep shoulder stretch in the back of your shoulder.
Hold for 30-45 seconds, breathing steadily. This targeted approach releases adhesions and improves joint mobility, specifically where overhead athletes need it most. Do 2-3 sets before pressing sessions. The posterior capsule responds quickly to consistent stretching, and you’ll notice improved bar path and reduced shoulder strain within weeks.
Drill 5: 90/90 External Rotations
Four key muscles make up your rotator cuff, and when they’re weak or inactive, your overhead press suffers dramatically. The 90/90 external rotation drill activates these stabilizers while improving your pressing mechanics.
Here’s how to perform this essential shoulder prep exercise: Lie on your side with your top elbow bent at 90 degrees, keeping it tucked against your ribs. Hold a light dumbbell (2-5 pounds) and rotate your forearm upward while maintaining the elbow position. You’ll feel the burn in your posterior shoulder.
This functional movement strengthens the infraspinatus and teres minor, crucial for injury prevention during heavy presses. Add 2-3 sets of 15-20 reps to your mobility routine. The controlled motion teaches proper shoulder positioning, ensuring you’re ready to press safely overhead.
Drill 6: Shoulder CARs (Controlled Articular Rotations)
Circular shoulder movements performed with maximum control transform your joint health from the inside out. You’ll perform these shoulder mobility drills by slowly rotating your arm through its full range, while keeping tension throughout the movement.
Stand tall and raise one arm forward. Create a large circle, moving as slowly as possible while exploring every inch of available motion. If you’ve got tight shoulders, you’ll feel restrictions at certain points. That’s where you’ll spend extra time working through the stiffness.
CARs serve as both assessment and treatment. They’re perfect as a warm-up for pressing because they activate all the small stabilizer muscles while improving range of motion. Do 3-5 controlled circles in each direction before training.
Putting It All Together: A Quick Shoulder Routine
Your complete shoulder mobility routine takes just 8-10 minutes but delivers massive returns on your overhead press.
Start with wall slides (8-10 reps) to activate your scaps. Move to thoracic extensions (30 seconds) to open your upper back. Follow with banded dislocates (15 reps) to stretch tight shoulders. Add the sleeper stretch (30 seconds each side) for posterior mobility. Perform 90/90 external rotations (10 reps per side) to fire up your rotator cuff. Finish with shoulder CARs (3 slow circles each direction).
Do this routine before every pressing session. For maintenance, perform it 3-4 times weekly on non-training days. You’ll notice improved overhead position within two weeks and significant strength gains within a month.
Frequently Asked Questions
Should I Do Mobility Drills on Rest Days?
Yes, you should definitely do mobility drills on rest days. They’re perfect for active recovery, won’t interfere with muscle repair, and help maintain joint health. You’ll see faster improvements when practicing them consistently between workouts.
Can Mobility Work Replace Traditional Shoulder Warm-Ups?
No, you shouldn’t replace traditional warm-ups entirely. You’ll get the best results by combining both. Use mobility drills to improve range of motion, then follow with dynamic warm-ups to activate muscles and prepare for lifting.
Will Improving Shoulder Mobility Increase My Bench Press?
Yes, you’ll likely see bench press improvements too. Better shoulder mobility enhances your range of motion, helps you maintain proper shoulder blade positioning, and reduces compensatory movements that limit power output during horizontal pressing movements.
Is It Normal to Feel Sore After Mobility Drills?
Yes, you’ll sometimes feel mild soreness after mobility work, especially when you’re new to it. That’s your body adapting to an increased range of motion. Sharp pain isn’t normal, though; that means you’re pushing too hard.
Can I Do These Drills if I Have Shoulder Impingement?
You can do modified versions if you have shoulder impingement, but start gently. Focus on pain-free ranges of motion and avoid overhead positions that pinch.